
What is Lustre DNE?
The Lustre Distributed Namespace (DNE) feature is a new technology developed for the Lustre File system. The feature it self allows for the distribution of file and directory metadata across multiple Lustre Metadata Targets (MDT). With this, you can now effectively scale your metadata load across a near unlimited number of targets. This both helps in reducing single metadata server hardware requirements as well as greatly expanding the maximum number of files your Lustre file system may contain.
The metadata structure appears as follows:
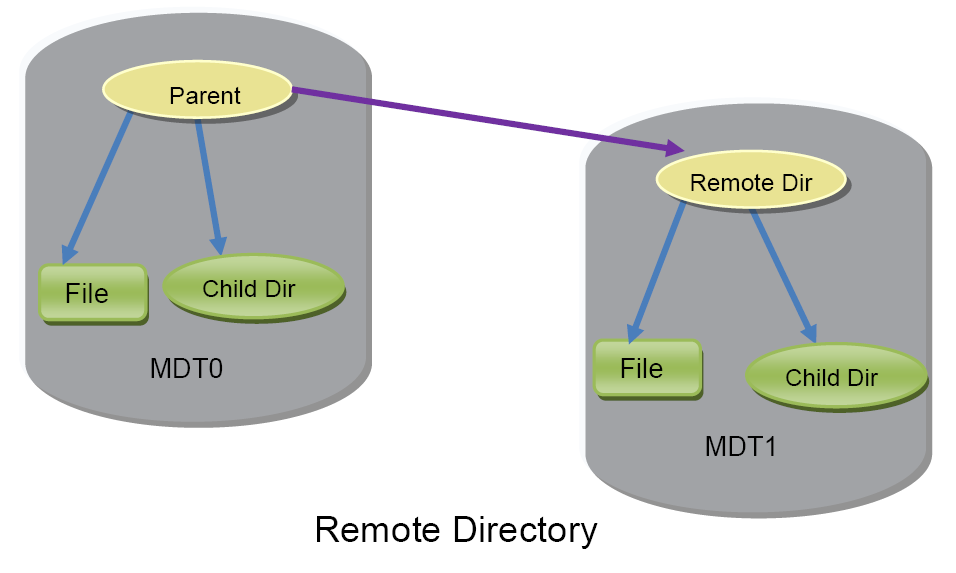
In this example from Intel’s DNE proposal document
Here we see that the parent directory (which in this case is the root of the file system) spawns a subdirectory indexed against the secondary Metadata Target (MDT1).
How is Lustre DNE Setup / Enabled?
Lustre DNE was originally introduced in Lustre 2.4 and further refined in later versions. In this case my examples below are from a recent Lustre 2.5 installation.
Lustre DNE can be enabled on any Lustre file system greater than or equal to version 2.4.0. To enable DNE, all one must do is create a new Metadata Target with an index greater than 0, and pointing to your Lustre management node (MGS). Multiple Metadata targets may exist on the same node, however it is not recommended as you will run into both CPU and memory contention and may not see much gains due to resource starvation (bus speed, etc).
Once formated and mounted, DNE will be available, that said, any clients mounted to the file system will need to re-mount the file system to make use of the new Metadata Target(s). This is because, as of currently, online DNE changes are not supported, however plans are to allow this in the future.
How do I create directories which will exist on different DNE targets?
Creating directories to point to different DNE targets (Metadata Targets) is quite simple. Once you’ve mounted all your MDT’s against your file system, and mounted (or remounted) your clients, you can now create directories which will target specific Metadata targets on specific Metadata servers. To do this, utilize the new lfs mkdir command:
# lfs mkdir -i 1 MDT1
# lfs mkdir -i 2 MDT2
The above command will generate two directories, MDT1 which utilizes metadata target index 1, and MDT2 which utilizes metadata target index 2.
Once complete, all new sub directories and files created within either MDT1 or MDT2 directories will exist on the specified actual metadata target (in this case targets with index numbers 1, and 2).
Files or directories moved out side of, say MDT1 into MDT2 will be moved from the metadata target 1, to metadata target 2, and so on.
How do I disable DNE or remove Metadata Targets I no longer use?
Disabling DNE and removing Metadata targets requires that you first move all file and directory metadata off of all metadata targets greater than 0. An example of this would be a file system structured like so:
(MDT0) ROOT /
(MDT1) ROOT / MDT1
(MDT1) ROOT / MDT1 / HOMES
(MDT1) ROOT / MDT1 / DATA
(MDT2) ROOT / MDT2
(MDT2) ROOT / MDT2 / SCRATCH
(MDT0) ROOT / USER_DATA
To disable MDT2 you will need to move SCRATCH and all associated sub directories and files into either ROOT/MDT1/. or ROOT/.
Once you have removed the data from the MDT2 DNE target you can unmount the provider for MDT2.
To completely disable DNE you will need to move all data on MDT1 and MDT2 DNE targets back to MDT0, in this case ROOT/. or ROOT/USER_DATA/.
In either case of MDT target removal a tunefs.lustre –writeconf is required against all file system targets (primary MGS, MDT, and all OST’s)